For those rare occasions when things go well….

Serving the worldwide community of radio-electronic homebrewers. Providing blog support to the SolderSmoke podcast: http://soldersmoke.com


The lower portion of the column on the right-hand side of this blog is where I put links to interesting blogs, YouTube channels, and web sites. Yesterday one of the links there led me to the above video. It presents a regen receiver using one 12AU7 tube and a 12 volt power supply. Wow! I have many of those tubes. And at 12 volts I am unlikely to electrocute myself. Count me in.
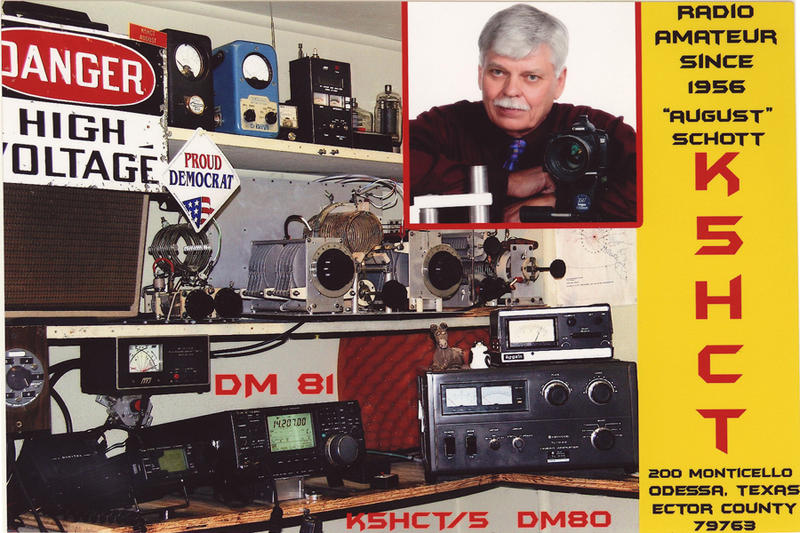
In the final minute or so of the video, the builder tunes around the 40 meter phone band. Suddenly I heard a familiar voice. It wasn’t recorded long enough for the callsign to be heard, but I was pretty sure it was our old friend August, K5HCT (Here Comes Texas) from Odessa.
Odessa, Texas is a good skip distance from both California and Virginia, so Pete and I have both talked to August many times. When I was testing out new homebrew contraptions, August was often there to help me out.
I was pretty sure it was August in the video. I checked with Pete — he too recognized the voice. Then I got an e-mail response from August — yea, it was him.
On the air, I often recognize a voice before I hear a callsign. In this case it happened via a somewhat wobbly regen and the internet.
THE RADIO GODS HAVE SPOKEN.
Now where did I leave those 12AU7s?
I’m still working on trying to match the excellent results Paul achieved with his AM receiver. Then this morning I wake up to a Hack-A-Day article describing his even more impressive achievement with his AM transmitter.
There was one line from the Hack-A-Day article that made me think of Pete Juliano:
Younger hackers will note the Arduino Nano at the heart of the project, running the VFO and handling all the relevant transmit/receive switching. We can only imagine how welcome modern microcontrollers must have been to old hands at amateur radio, making synthesizing all manner of wild frequencies a cinch.
Indeed.
And once again this story about Paul’s AM operations has made me jealous of the obviously great AM homebrew culture that exists in Australia.
FB Paul!
I really like the way Lex PH2LB measures and demonstrates the effectiveness of the Hi-Per-Mite CW filter designed by David Cripes NM0S. Watch the short video above. The blue trace is the audio input to the filter, the orange trace is the output. Watch the output change as Lex sweeps the audio frequency range.
He wrote:
After studying the schematic I shifting through my spare parts stock to collected the components and build one according there design on a breadboard (I changed the center frequency from 700 to 600Hz).
I hooked up my signal generator with a amplitude of 2v max and sweeped it from 250Hz to 2KHz looking at the output on my rigol osciloscoop. On 2khz VMAX=0.04V, 885Hz=0.2V, 700Hz=1.5V, 662-585Hz=2V, 400Hz=0.2V, 500Hz=0.9V, 250Hz=0.04V. So a nice flat top between 585Hz to 662Hz.
A full description of Lex’s project (with more videos) is here:
https://www.ph2lb.nl/blog/index.php?page=ubitx-mods3#ubitx-mod14
Lex’s Knack Story and the intro to his blog is here: https://www.ph2lb.nl/blog/index.php?page=history
Back in 2014, when I was putting together my EB-63A solid state amplifier, I had to learn how to tap aluminum so that I could attach my transistors to the heat sink. I did short YouTube video on how I did this (with tales of woe!). This video turned out to be amazingly popular — more than 27,000 views! Apparently there is a great thirst for this kind of knowledge out there. Recently someone in Alaska came across my video and shared with us some more useful information on how to tap metal. Here is some tribal knowledge from Paul KL7FLR:
Hi Bill and Pete,
Stumbled over Bill’s YouTube video about tapping in Aluminum and I would like to add my experience doing such. I have probably tapped over a 1000 holes in various metals, cast iron, steel, aluminum, bronze and brass from 0-80 to ¾-20. Each metal poses its own problems and solutions. There was nothing in error with your video or the method you presented.
My comments:
What causes broken taps is the tap is not being perpendicular to the work. A hole not perpendicular to the work, a worn/dull tap (this applies to the drill bit too) and lack of lube.
Every hole to be drilled and tapped must be perpendicular to the metal. A hand drill electric or battery will not be perpendicular unless two other people can spot the drill operator. Not possible when you are alone in the shop.
Any serious homebrewer should have a drill press. A small bench drill is very inexpensive. Even the $69 Harbor Freight model is adequate for the average ham’s workshop. I see these items at flea markets and on Craigslist all the time cheap. Estate sales not so cheap but sometimes on last day you might get a bargain. Adjustable from 500 to 3600 rpm will cover all the normal sizes of drills. An x-y table could be added ($$) for added accuracy if desired. (search x-y table for examples and sources)
The size of hole you drill makes a difference too. Most drill charts assume you are tapping at 75% of thread contact. This is amount of the male thread of the bolt/machine screw threads contact the female thread in the piece. This is about the max you can expect without some precision tooling that won’t be in the average home shop. 75% provides maximum strength of the fasteners. So unless you’re working on something that requires strength like a tower support bracket or the wings of an airplane you don’t need 75% as 50% thread contact is more than adequate. So when the drill chart shows that a #43 you can instead use a #42 or a 3/32 drill. A little bit larger hole will be a lot easier to tap threads.
The type of tap will also influence the difficulty of tapping threads. The typical hardware store tap is a straight 3 or 4 flute taper tap. The chamfer of a taper tap is 9 threads making tapping much easier. This is the tap for hand tapping. The plug tap has a chamfer of 5 threads and is best used in a tapping head or fixture. The bottom tap is for tapping threads in a blind hole, usually after started with a taper tap. That increases the pucker factor x10. The normal taper tap cuts as it is rotated in a clockwise direction or counter-clockwise for left hand threads. The cuttings will clog the tap and you must back the tap out frequently to clean the cuttings from the flutes preventing the tap from seizing and possibly breaking the tap. Breakage is easily done with the smaller taps but also will happen to a larger tap too. There is a style of tap called a spiral point tap. It will push the cuttings up to the top of the hole and not clog the flutes as easily as the straight flute taps. I still back it out and clean it out of habit. These don’t cost any more than the hardware taps. A 4-40 is about $2.90 the last time I bought one.
Avoid “carbon steel” taps. These will break easier than “high speed tool steel” taps and they are usually a few cents cheaper too.
Lubrication is necessary. Bill’s use of 3-in-1 oil is a good lube but “Tap Magic 20016A Aluminum” fluid is better for tapping aluminum and regular “Tap Magic” for everything else. https://www.amazon.com/Tap-Magic-20016A-Aluminum-Yellow/dp/B00065VEUO
The metal you are tapping can be an exercise in patience. “Hardware” store aluminum comes in various grades from crappy to real crappy. They are of an alloy best suited for the extrusion process and are not wonderful for the tapping process. Aircraft grade aluminum is nice stuff to work with but not cheap. Comes in many grades from 1000 series to 8000 to match the application. Grade 2024 is communally found and is easy to work with while 7075 works like steel. Since most of us won’t be buying a 21 foot stick of aluminum or a 5×8 foot sheet we must take the hardware store grade into account when tapping holes and lean towards the 50% thread engagement, plenty of lubrication and lots of patience. I frequent several aluminum boat building firms and they let me pick through their scrap piles and I’ve made frequent donations of a case of soft drinks or a can of coffee to the break room fund and have also paid the going scrap price for the scrounging privilege.
Worn taps: These get dull with use and will break at the worst possible time and in an expensive workpiece. Broken taps can be removed but are time consuming and require some expertise in doing so. Best to retire them when worn. I used to keep a chart of how many holes a particular tap had been used and at 35 holes for the small taps they got retired. 50 holes for taps larger than ¼”. I once spent over a week of evenings extracting a worn tap from a locomotive cylinder casting. Never again! As my mentor said many times, “dull tools cause accidents and ruined work”.
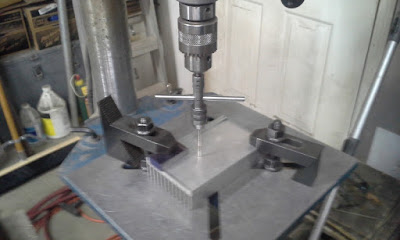
Clamp the work to be tapped stationary if possible. You don’t want it moving around thus inviting a broken tap. Use some method of a tap guide (as Bill did with a block of wood, not great but better than nothing). I use what is called a “Piloted tap wrench”, https://www.amazon.com/Set-Wrench-Piloted-Spindle-Capacity/dp/B077SVQD4S .
Picture is of my setup.
Step 1: Work clamped securely to table at desired hole location.
Step 2: Drill hole.
Step 3: Use piloted tap wrench to tape hole.
Step 4: Done.
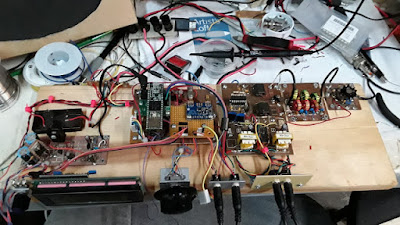
Coming home from the Dominican Republic, this was a major item on my list of desired mods for the uBITX: a narrower passband for CW. Using the 2.3 kHz SSB passband, you could have many CW QSOs audible in your headphones. Narrow that passband to 200-300 Hz and life gets a lot easier.
Farhan had discussed adding a 12 Mhz IF filter of suitable CW bandwidth, but this seemed difficult to me. Besides, I have long wanted to use an active audio filter for this purpose.
The Hi-Per-Mite filter from 4 State QRP Group is just what I needed. I built the kit without problems in about an hour, then I put it in the uBITX box, with switch on the front panel that lets me put it in the circuit or take it out — this is very satisfying and a lot of fun.
The Hi-Per-Mite just goes between the uBITX audio out and the speaker/headphone connection. I built mine for “no gain” — the uBITX provides plenty of audio.
The selectivity with the Hi-Per-Mite compares favorably to that of my Drake 2-B with the 500 Hz LC filter. You can get an idea of the performance in the video.
Three cheers for the 4 State QRP Group and their Hi-Per-Mite! Here is the page with all the info:
http://www.4sqrp.com/hipermite.php
Obviously a lot of potential here. Thanks to Hack-A-Day for the alert.
https://hackaday.com/2020/02/14/rf-shield-turns-arduino-and-pc-into-shortwave-radio/#more-398447
Obviously a lot of potential here. Thanks to Hack-A-Day for the alert.
https://hackaday.com/2020/02/14/rf-shield-turns-arduino-and-pc-into-shortwave-radio/#more-398447
I have misgivings about this. Hack-A-Day presents it as a DIY radio project and wonders if this might be the modern equivalent of the crystal radio projects of days-gone-by. But notice that the “build” video focuses mostly on building the box. The electronic “building” of this radio mostly involves plugging in two chips, or two boards with chips. My questions are:
1) When this project is finished, who REALLY built it? You, or the Si4730 manufacturer?
2) After you’ve “built” this thing, would you have the same sense of accomplishment that you get from an analog, discrete component project? Or even from that crystal radio?
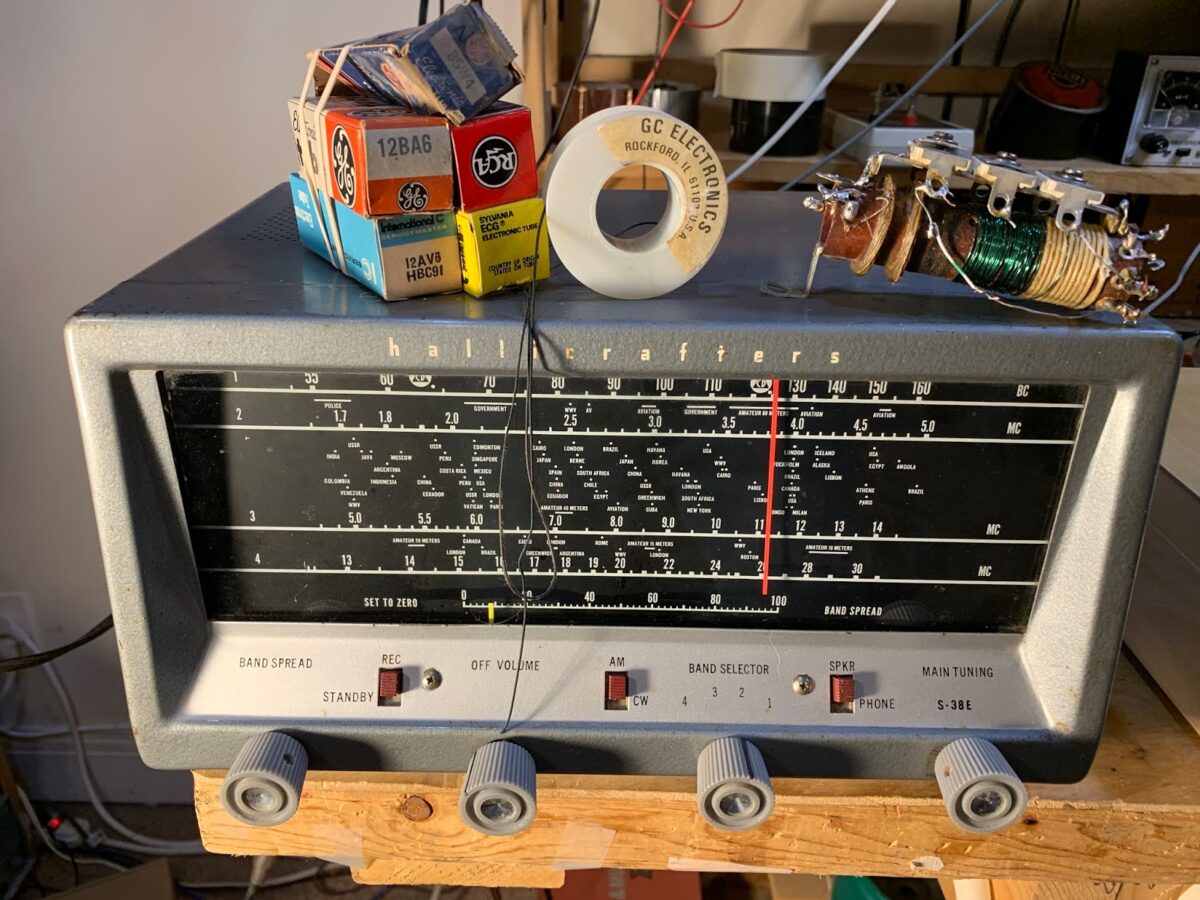
Of course, to each his own. This is all for fun. Have fun with the Si4730. But today I’ll be working on my Hallicrafters S-38E.
https://hackaday.com/2020/02/12/all-band-radio-uses-arduino-and-si4730/
My Hallicrafters S-38E was on very thin ice. I had grown tired of the little beast. Its dangerous no-transformer power supply had caused me to risk death and to fry one of the RF input coils (that happens if you short the antenna input to an inadvertently hot chassis). It is rickety and old and I just got tired of working on it. I had down in the basement, awaiting disposal of some kind. (I’d been afraid to give it away, fearing that the recipient might electrocute himself.) But recently I’ve been doing some shortwave listening and this caused me to reconsider the S-38E.
Around this time, while looking at e-bay, I saw some guy selling just the RF input coil that I had fried. So I bought it. Then I pulled the S38-E out of the basement and fired it up. I realized that I had already done a lot of work on it. I had put in an isolation transformer, so the receiver was no longer quite so dangerous. I’d already replaced most of the capacitors. It sounded pretty good on the AM broadcast band. Then, in my first scan of the shortwave bands, I heard the William Tell Overture pouring from the speaker (see video). Could it be? Perhaps a replay of the Jean Shepherd show? No, but I soon heard the familiar voice of Tim WA1HLR — he was doing his show on (I think) WBCQ shortwave, just above our 40 meter band.
THE RADIO GODS HAVE SPOKEN. THE S-38E STAYS!

Thanks Bob!
The AM Rally this past weekend was a lot of fun. I was reminded of how the guys that you talk to on AM are just so much more likely to be running interesting homebrew or vintage gear.
First contact was with Howard VE2AED who has one of the most amazing antenna farms I have ever seen. Take a look:
https://www.qrz.com/db/VE2AED
He also has an R-390 and a KWM2 in his shack.
Next I spoke to Robert W0VMC (Voice Modulated Carrier) out in Wisconsin. Robert is a homebrewer of AM gear with a Knack story that is very familiar: http://w0vmc.com/
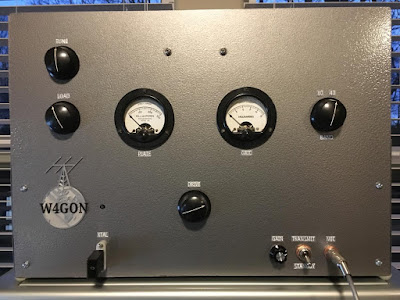
Next up was W4GON. Joel was on the homebrew AM transmitter that we reported on back in 2017:
https://soldersmoke.blogspot.com/2017/08/thermatrons-al-fresco-w4gons-fb-hb-am.html
Joel has completed his rig, adding a FB front panel. Here it is:
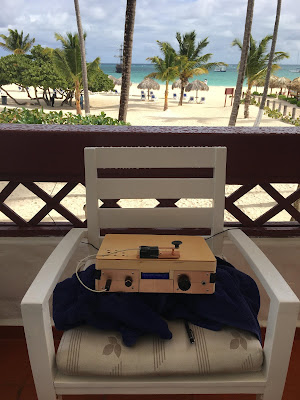 |
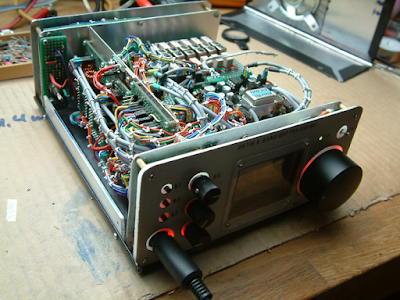
| Bill’s Bavaro DR Beach Station uBITX in the box, HB key |
Back to Bill’s Bench:
 |
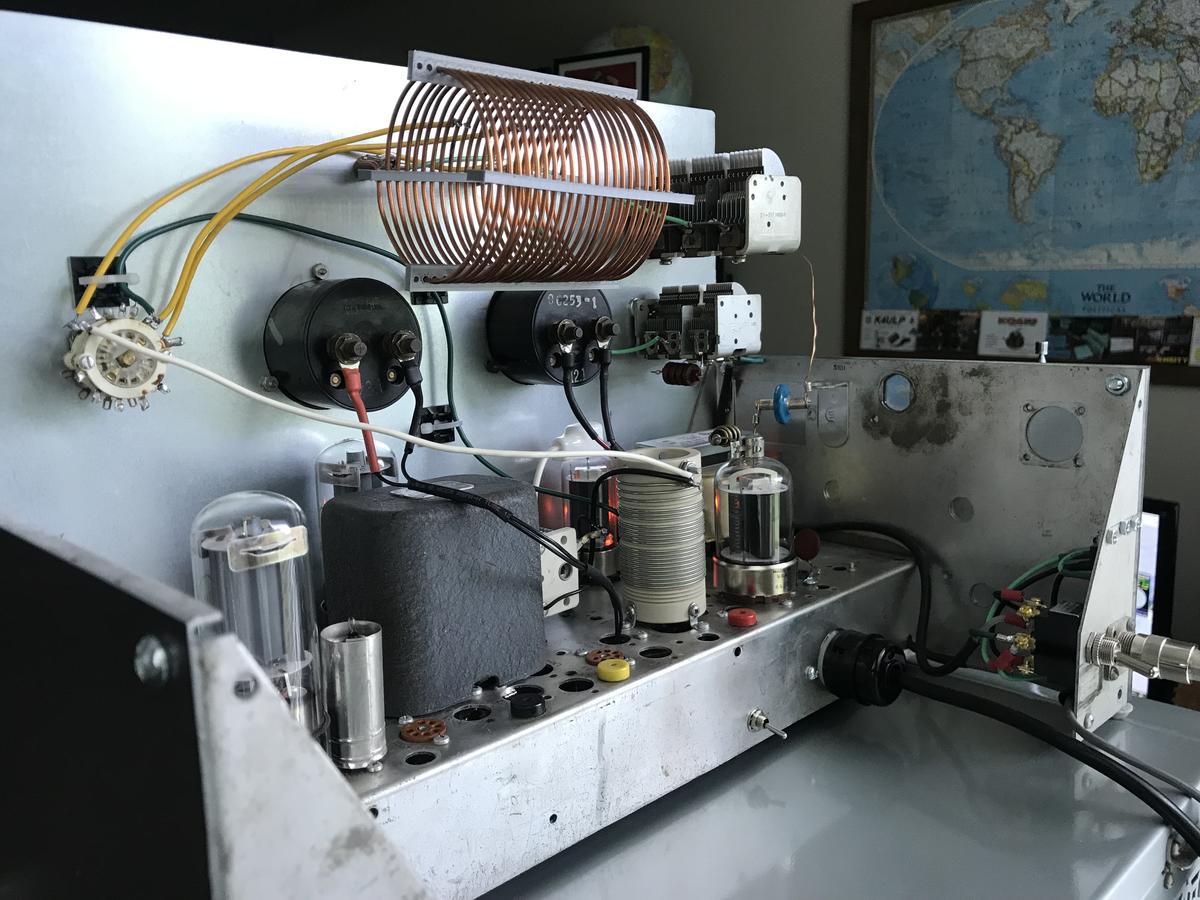
| Pete’s Plank SDR When you know stuff, you can do stuff! |
Congratulations to Jim WA2EUJ. First Place the NXP Design Challenge.
You can buy the board here:
https://sites.google.com/site/rfpowertools/home/nxp-mrf-101
Thanks to Pete Eaton WB9FLW for alerting us to this.
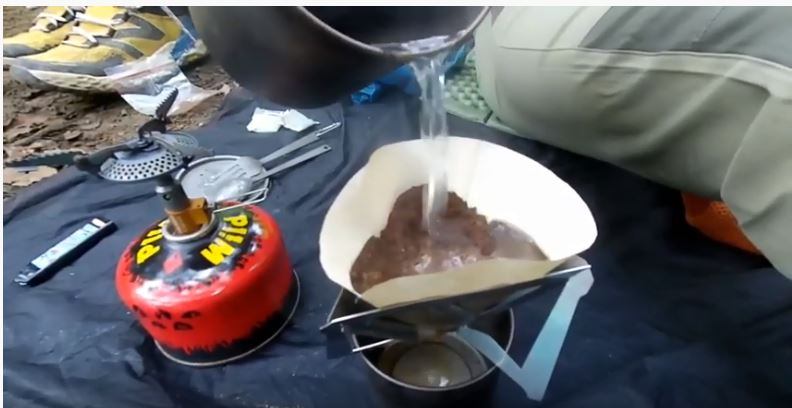
OM Kenji has an awesome video about a mountain topping trip that took place in Indonesia just yesterday. Very nice.
I like the use of the neodymium magnets to attach the paddles to the rig. I may try that with my homebrew straight key and the Samana-uBITX. Or I may have to get a keyer and learn (finally!) to use paddles. (But simplicity is a virtue and there is nothing more simple than a straight key.)
Kenji is obviously an amazing cook, even in the field. I like the coffee-making technique.
Check out more of his videos (and subscribe) at his YouTube Channel page:
https://www.youtube.com/channel/UCpfn1viFoqVmWk6x891nKaQ
Thanks Kenji!
I cringed when, at about the 32 minute mark, during a discussion of the moral necessity of preserving old gear, Michael appeared on the screen with a Heathkit Q multiplier sitting right there next to him. It was as if he was talking about me. I felt as if I had been hauled into Ham Radio Court, Judge Michael Murphy presiding.
I have already REPEATEDLY admitted to sacrificing MULTIPLE Q MULTIPLIERS. But I did it for good reasons:
1) I have some objections to use of regeneration, especially in superhet receivers. After all, Armstrong created the superhet in part to free us from the tyranny of regeneration (that he had also invented).
2) This is a case where the parts ARE greater than the sum. Specifically that variable cap WITH reduction drive. And that perfectly sized metal box. Those capacitors are currently in service in at least two of my homebrew SSB transmitters. And as I look around the shack, I see one of those boxes housing an Si5351 VFO, and another holding the dual-digital frequency displays for my DX-100/HQ-100 AM station.
3) Mike notes that these Q-multipliers are being sold for TWO DOLLARS at hamfests. At prices like this, temptation is just too strong.
So I plead guilty, your honor. But I ask the court to consider the circumstances under which I dismantled this obsolete gear, and the good uses that I made of the parts that I obtained. Also, I’d like to make note of the fact that I salvaged from a junk pile a Heath VF-1 (I completely rebuilt it) AND I restored to usefulness a Heath DX-40 — both these devices appeared in the WU2D video. Finally, if anyone really needs the remaining parts from the now deceased QF-1s, I’d be willing to donate them (in an effort to redeem myself).
Thanks Mike!