 |
| DC RX VFO and Buffer |
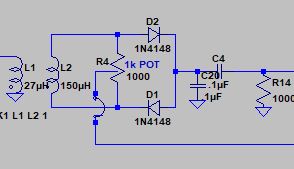
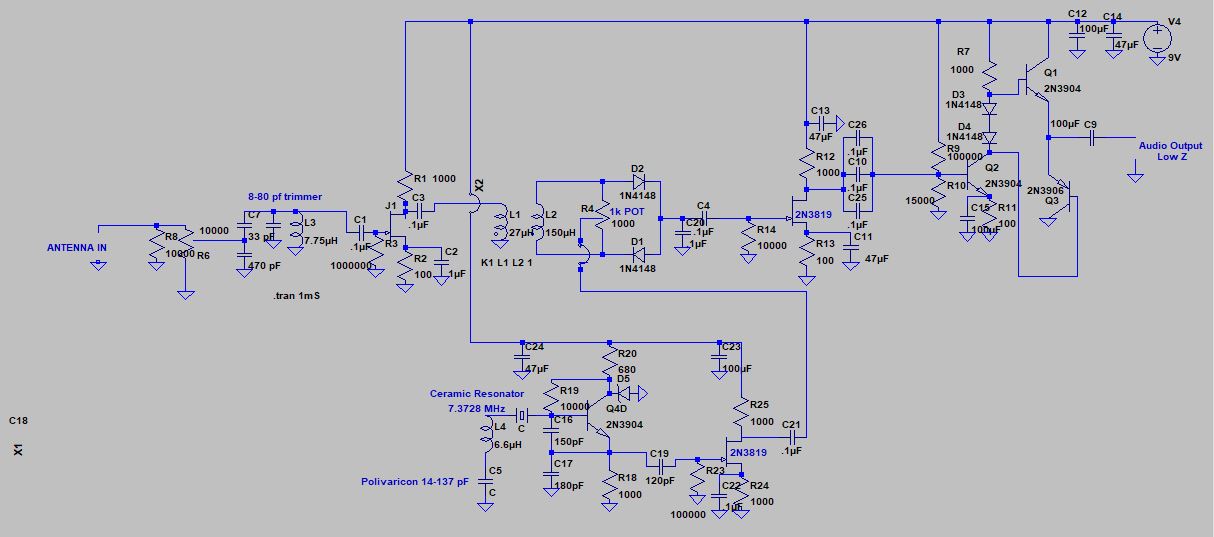
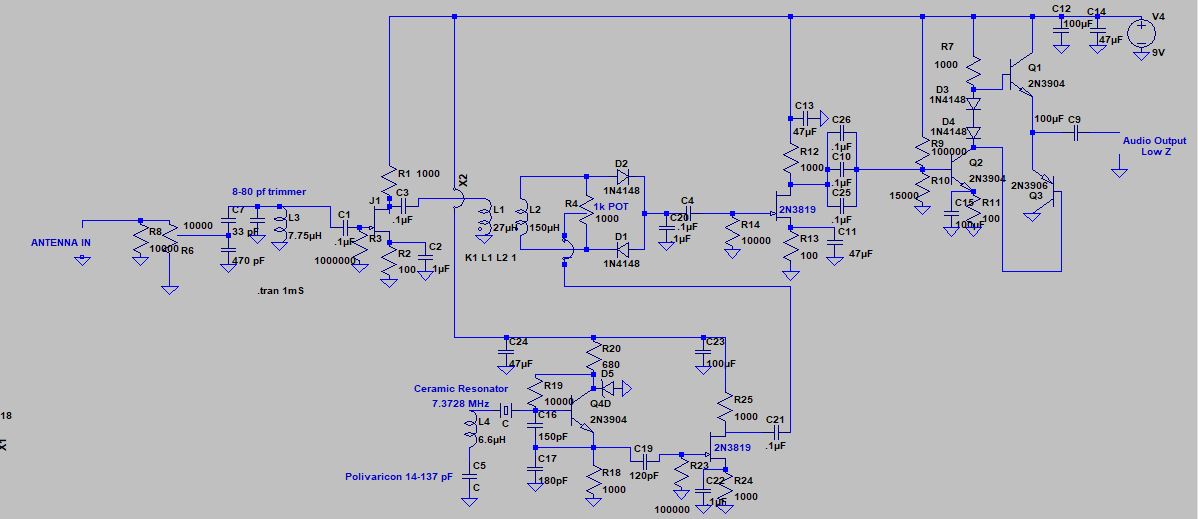
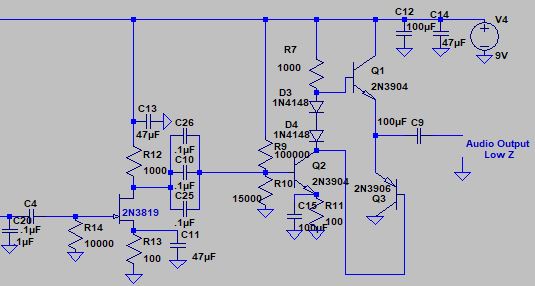
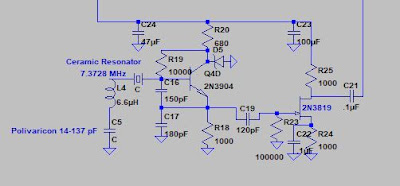
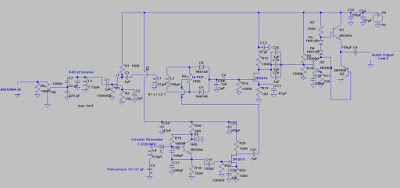
I’ll put the full schematic at the bottom of each of the posts so that you can easily refer to the big picture. Above you see the schematic of the VFO circuit.
OK, here we go. Let’s build the oscillator. Our goal is JOVO — the Joy Of Variable Oscillations.
At this point you should have a big-enough copper clad board, and you should have given at least some thought to what kind of enclosure you are going to put the board in when you are done. It pays to think ahead at least a bit, but don’t get so carried away with planning that you never get around to building.
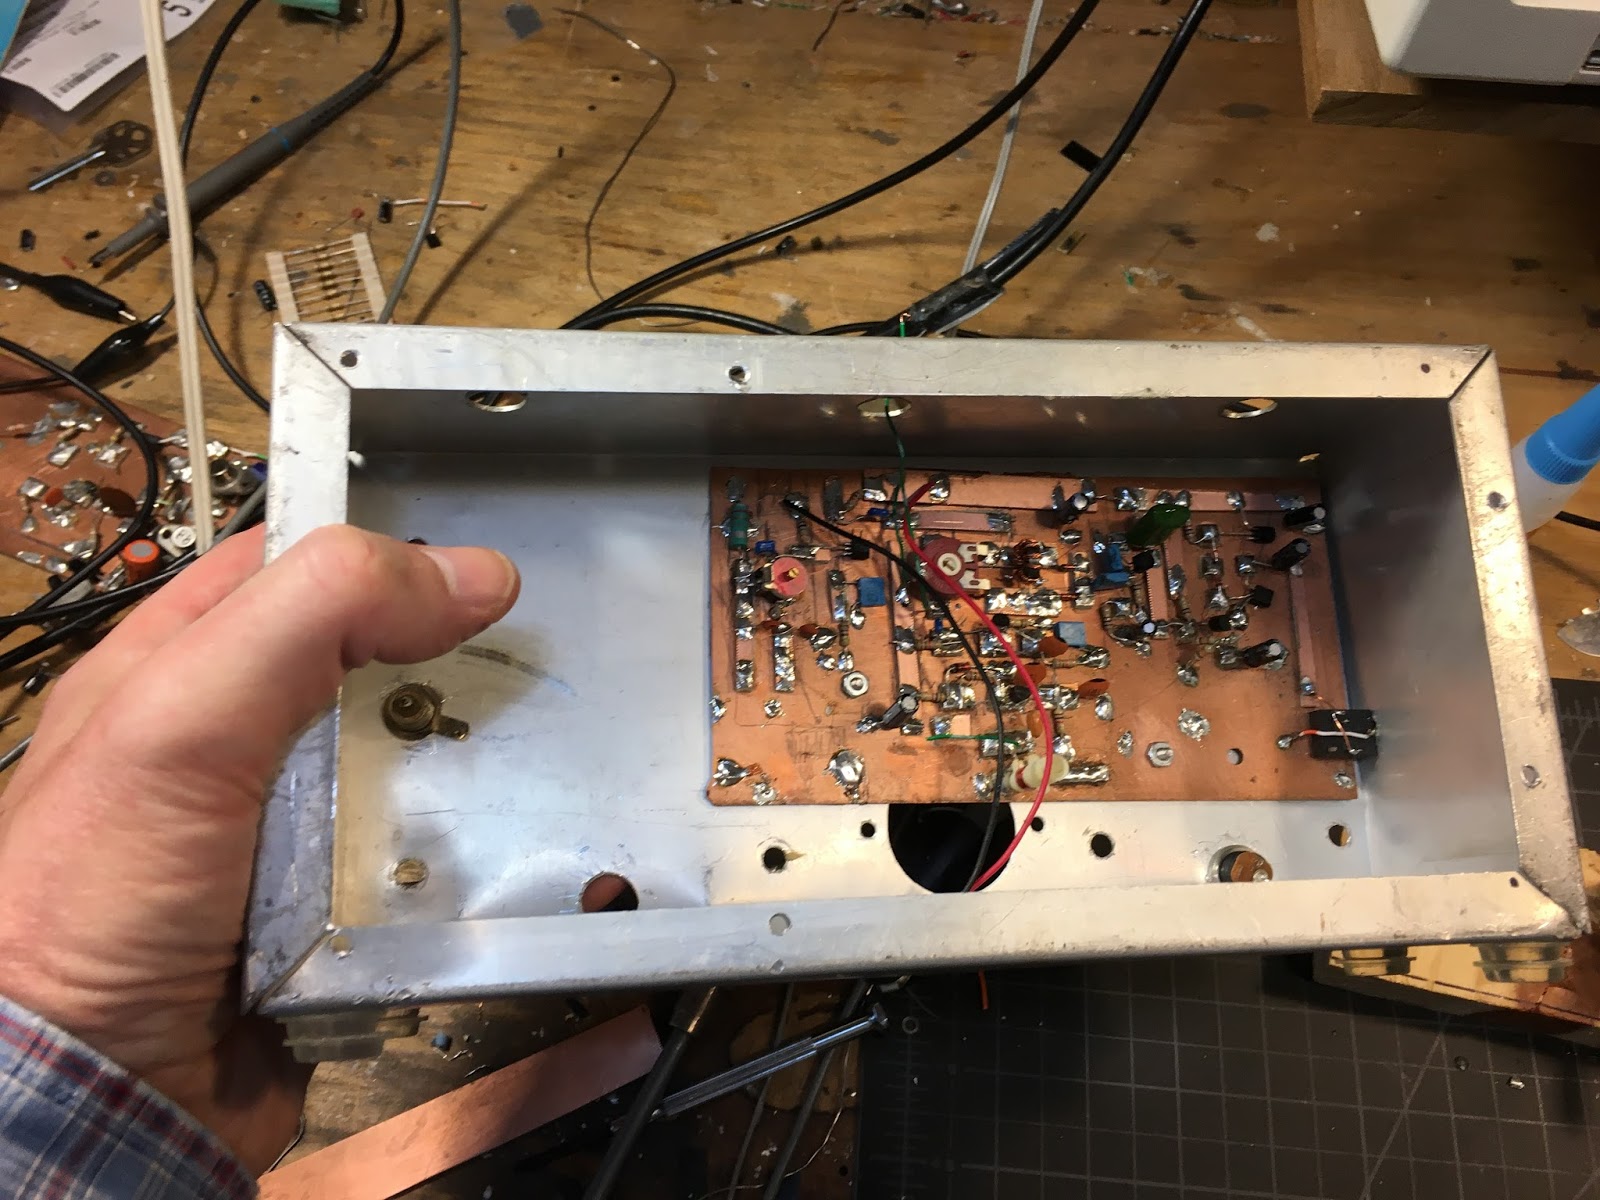
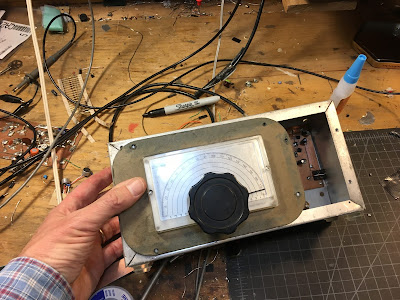
You should plan the allocation of the space on the board. Think about where you are going to place each stage. You can mark out the spaces with a pencil or a Sharpie marker. You might want to look at my board for ideas:
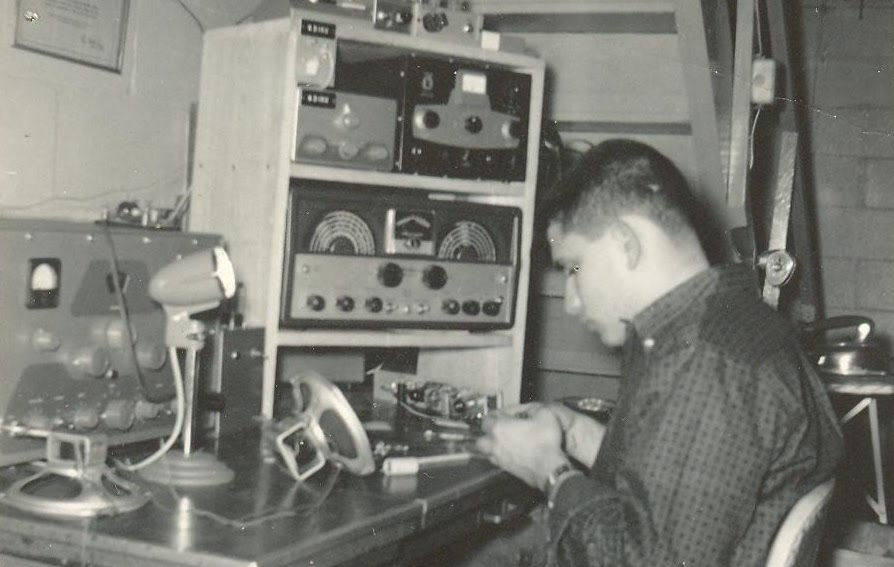
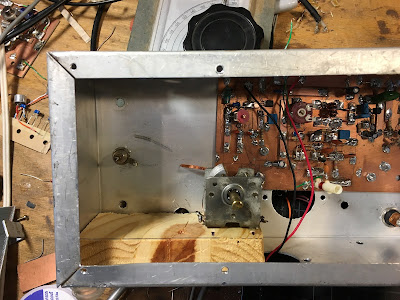
In the picture above you can see the four stages. On the left side of the copper-clad board you can see the Front end: the input filter and the RF amplifier (transistor near the top). Moving toward the center you can see the mixer stage (around the circular 1k trimmer potentiometer). Below the mixer (near the big round hole in the Bud Chassis) is the Variable Ceramic Oscillator stage and its buffer amplifier. The right 1/3 of the board is taken up by the audio amplifiers. Note the use of Manhattan pads throughout. Click on the picture for a closer look.
Once you know where you will put the VFO, eyeball the schematic and think about where you will need Manhattan pads. I often start by thinking of three rectangular pads for each transistor, one for each lead. You can see that there are a lot of parts hanging off each of the terminals. I sometimes put a long strip across the top or the middle of the board to carry the DC voltage.
Since this is an oscillator, you don’t have to worry too much about keeping the outputs away from the inputs. You want this one to take of on you.
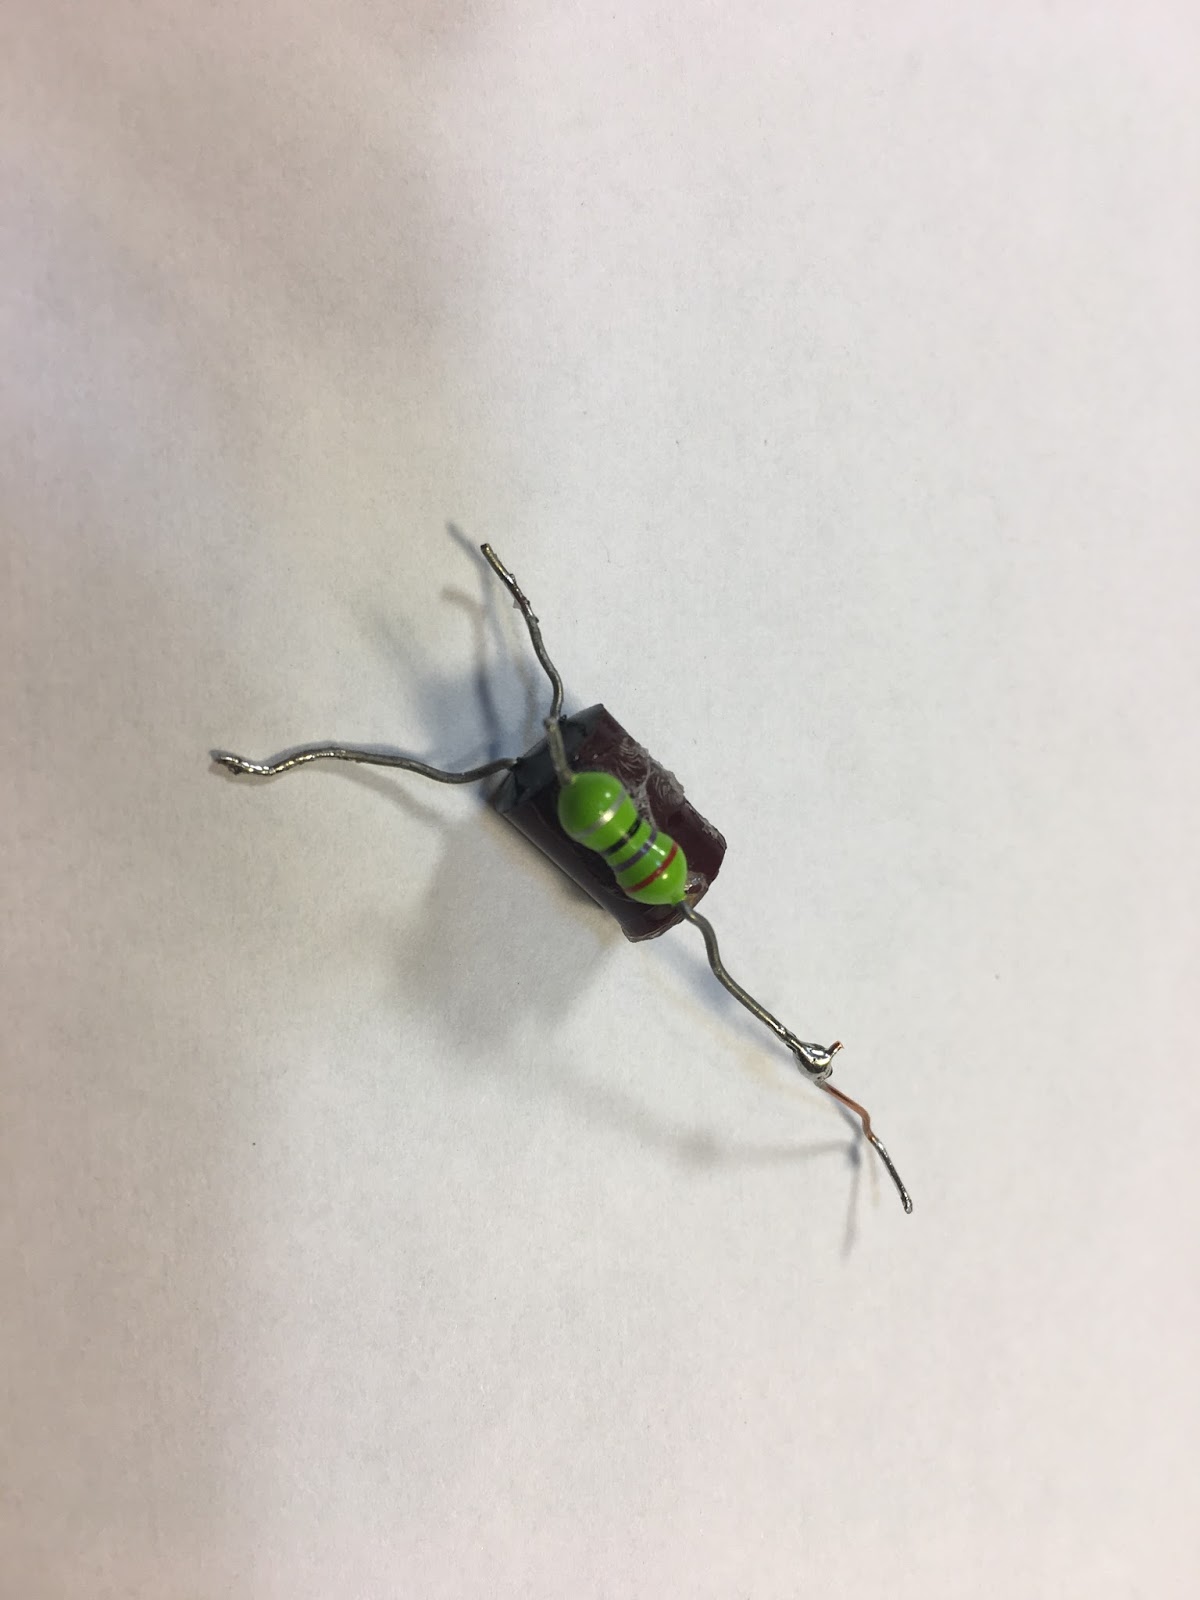
For the feedback capacitors (C16 and C17) and the output capacitor (C19) , get some ceramic disc NPO caps. I put a 180 pf cap at C17 only becasue I didn’t have a second 150 pf cap in the junkbox. Either value will probably work.
You can, to start, build this circuit WITHOUT the two components that allow you to vary the frequency: without L4 and C5. Just run the left end of the ceramic resonator to ground. See below.
Connect a 9V battery to the top of C24. Without L4 and C5 (with one end of the resonator to ground) you should be oscillating at around 7.168 MHz (the capacitors in the oscillator circuit are pulling the frequency down from 7.37 MHz).
You need some way to find out if it is oscillating. If you have an oscilloscope, great. Put the probe at the output and take a look. But perhaps a simpler and more satisfying way to do this test is with a radio receiver. Tune the receiver around 7.168 MHz. You do not need to connect your receiver to the oscillator. You should be able to hear it. If you do, congratulations. If not, check your work. Be patient. This is not plug and play radio!
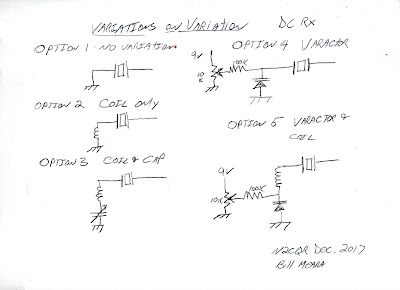
Once you get the thing oscillating, it is time to make it variable. Here is an opportunity for variety and experimentation. Here are some of the options you have:
Here is what I found. The frequency stability of these circuits vary. But all of them are stable enough. They might drift a bit so that you have to retune the dial every few minutes. If that realy bothers you you can upgrade to the air core coil with air variable cap arrangement.
When I put just a variable capacitor that goes from 17 pf to 159 pf between the ceraamic resonator and ground, I was able to tune the oscillator from 7.220 MHz to 7.420 MHz.
If I put a fixed 8.18 uH coil between the ceramic resonator to ground that moved the frequency to 7.010 MHz. You could use a toridal core coil for this, but I had best results with an air core coil. By putting the 17-159 pf variable cap between the coil and ground (similar to the arrangement shown above) I could tune from 7.010 MHz up to 7.367 MHz.
You could also replace the variable capacitor with a voltage variable capacitnce diode (aka a varactor or a varicap diode). I had good results with an MV2301.
You could try using a cheap little polyvaricon capacitor for C5, but my best results came with an air variable. Walter KA4KXX points out that nice variable capacitors are available here:
I ended up using a 3 uH air core coil with a variable cap of around 365 pf this allows me to tune from 7.115 MHz to 7.300 MHz (all of the phone portion of the band) with very good stability — Juliano Criteria levels of Stability.
One more idea: As you build this stage, or right after you finish it, go ahead and build a dulicate circuit, perhaps without the variation components. Why? Well that second oscillator might be useful when it comes time to peak and tweak the front end input filter of your receiver. And that second oscillator can become the start of a second version of this project.
Now I’m going to the beach. I hope the holiday season bring you all joy — especially the Joy of Variable Oscillations. Send us reports on your progress, your joy, or your tales of woe.
 |
| The Big Picture |