BITX 2040 Build Update #3 Receiver Sounds Great!

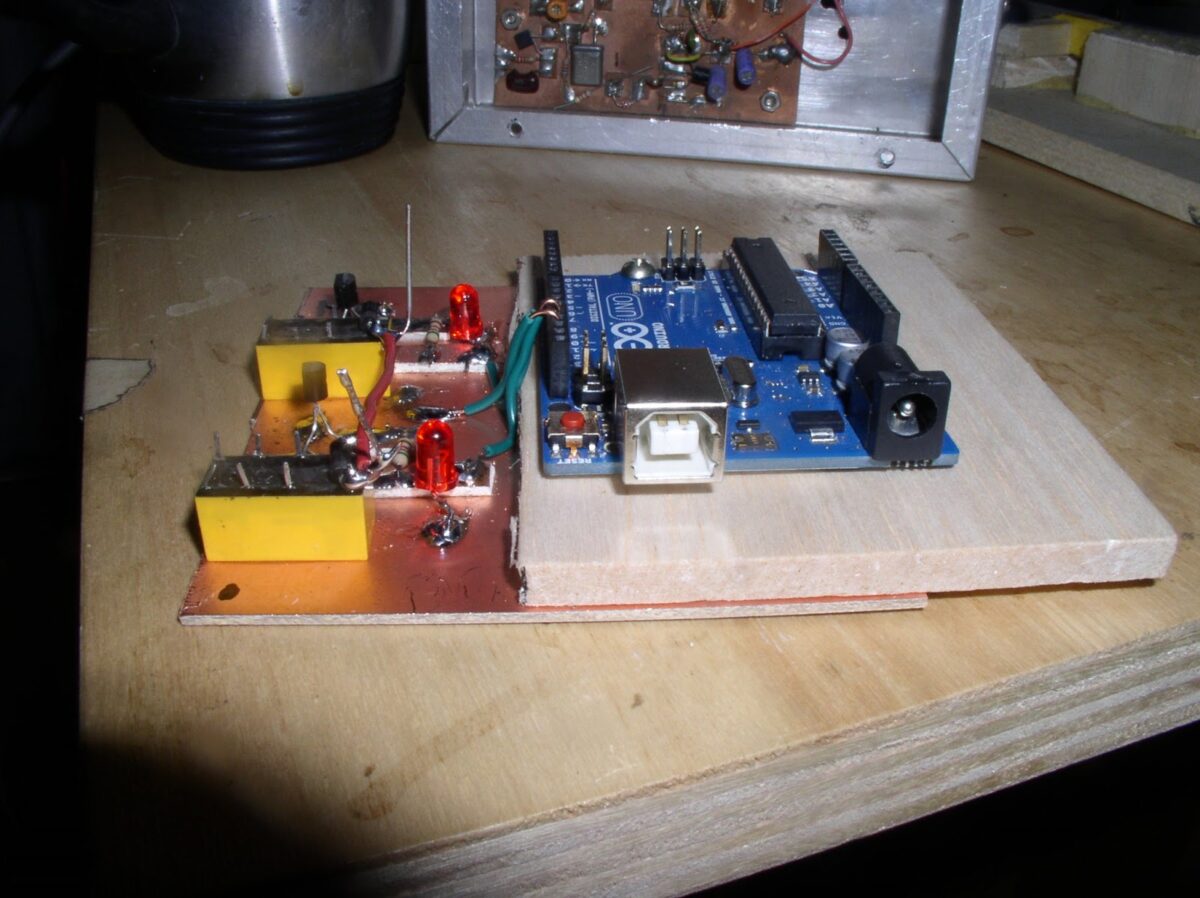
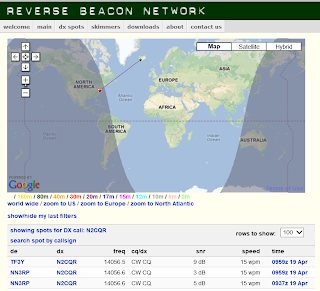
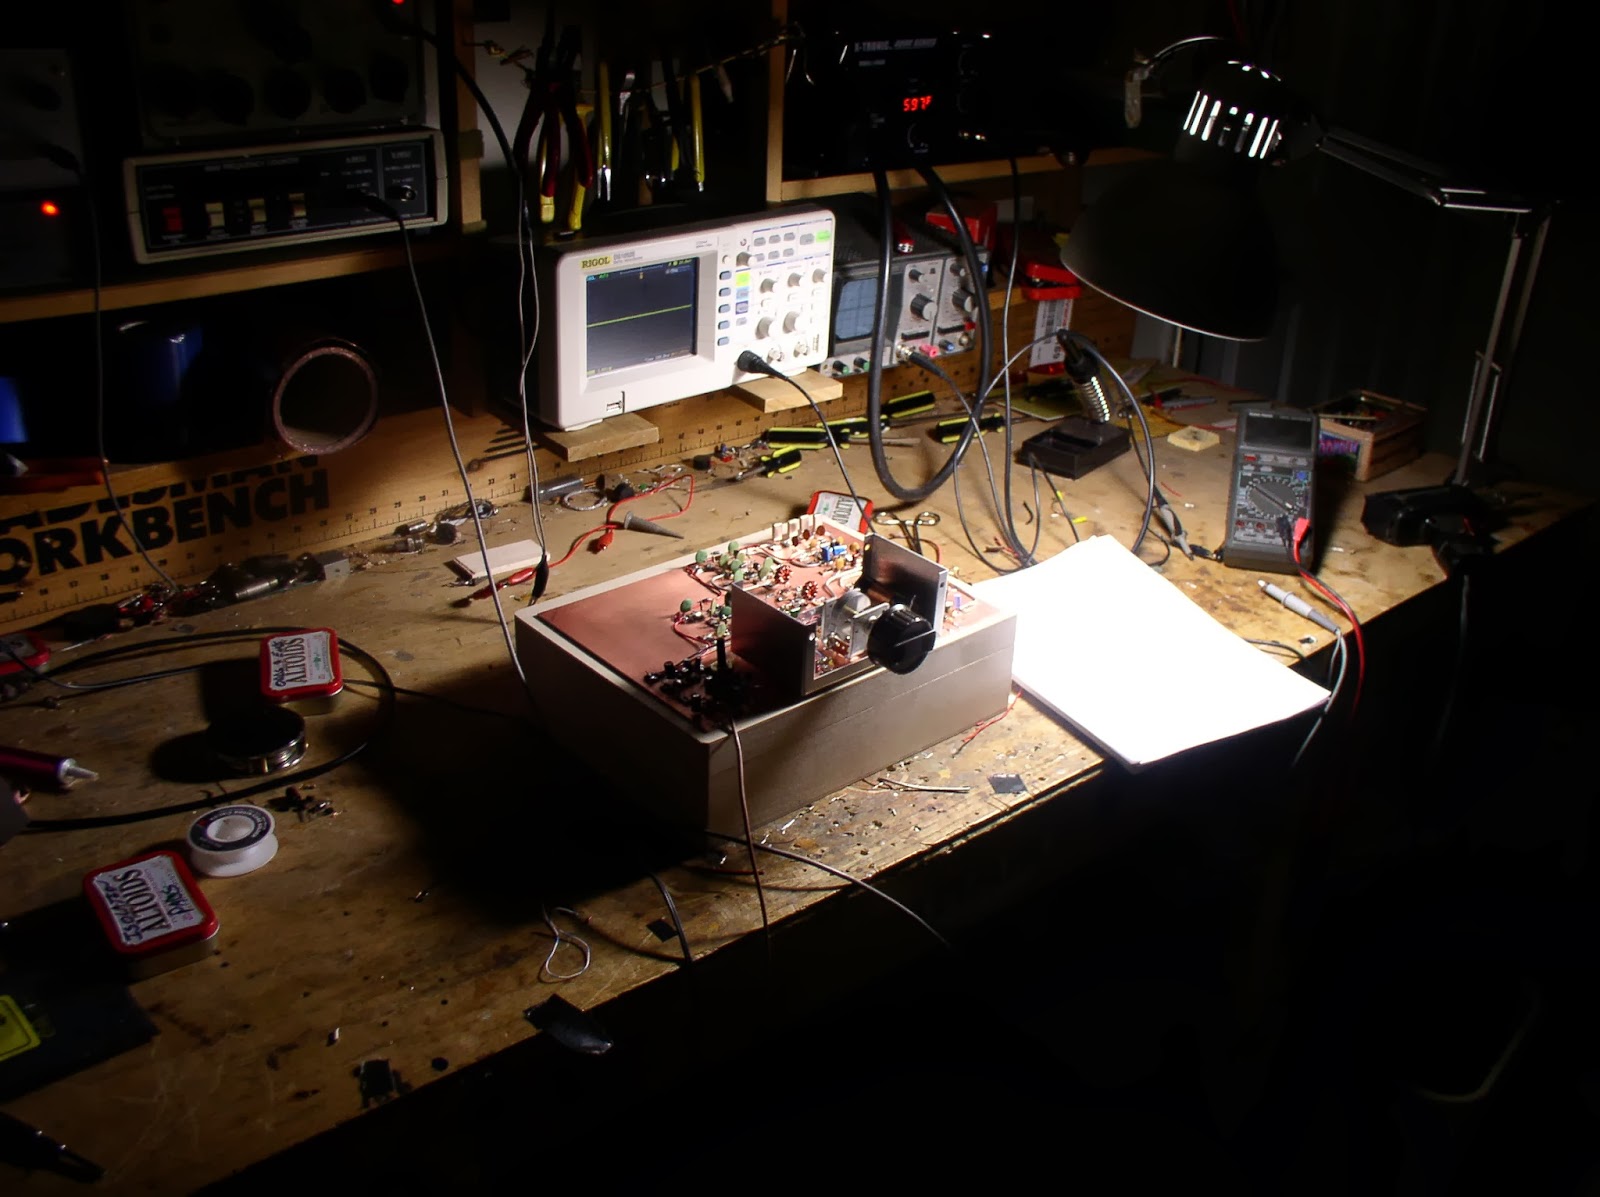
There it is, my second BITX transceiver, this one for 20 and 40. Once I got the VFO sorted out, this one went together very quickly. Obviously experienced gained on the first project was a big help.

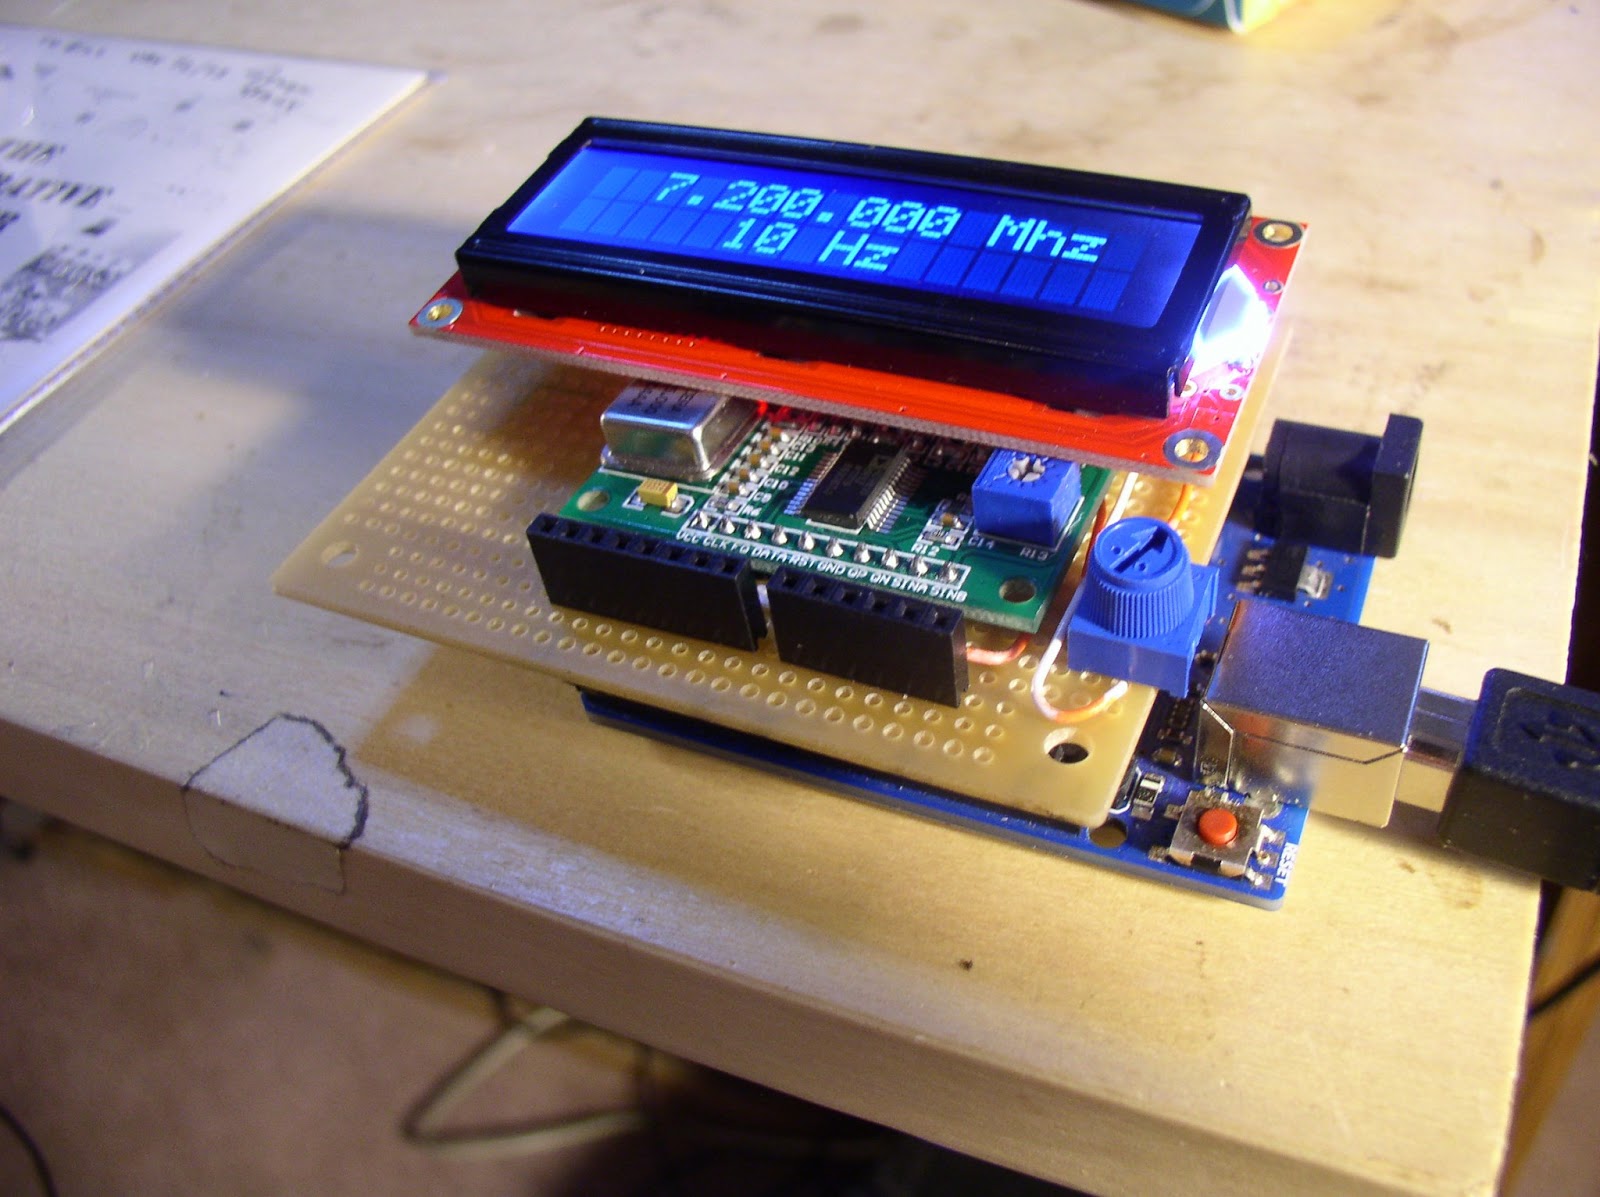
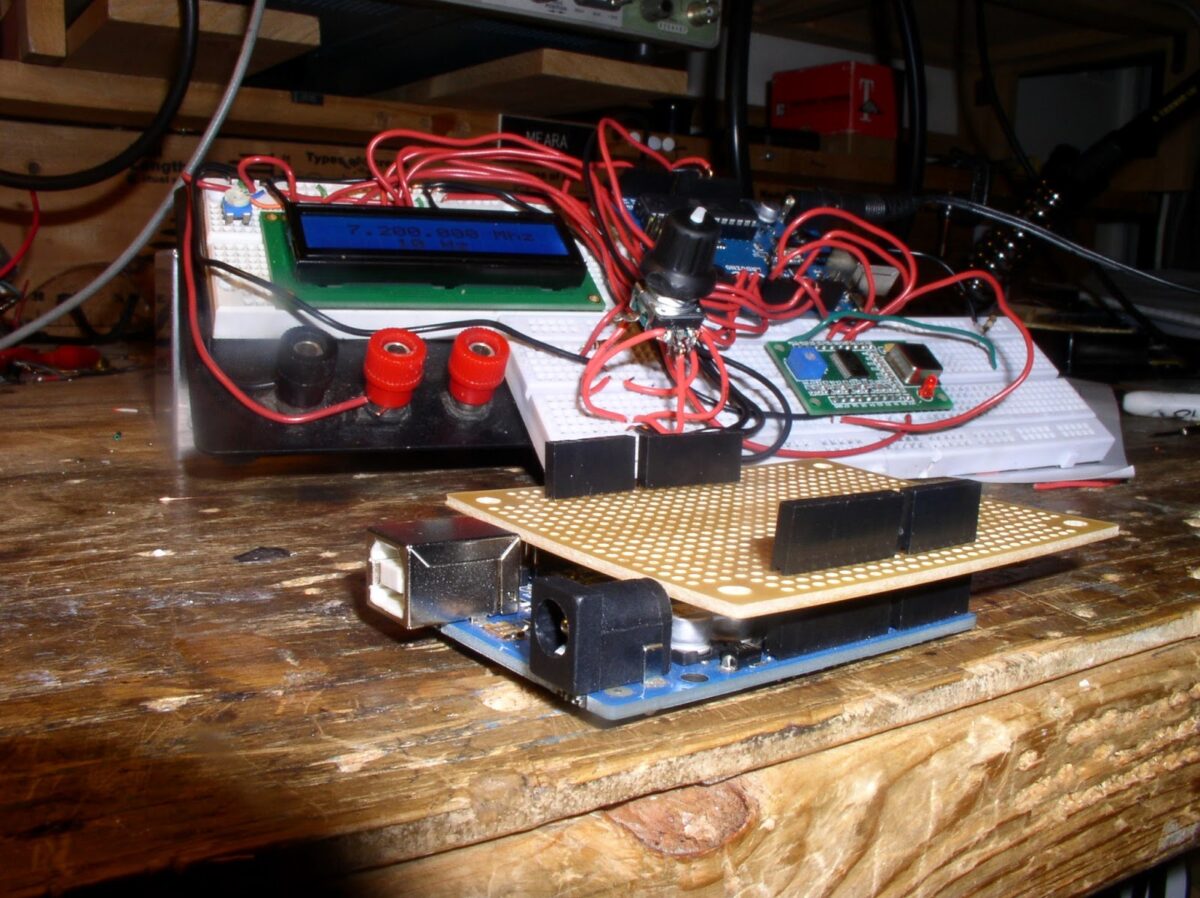
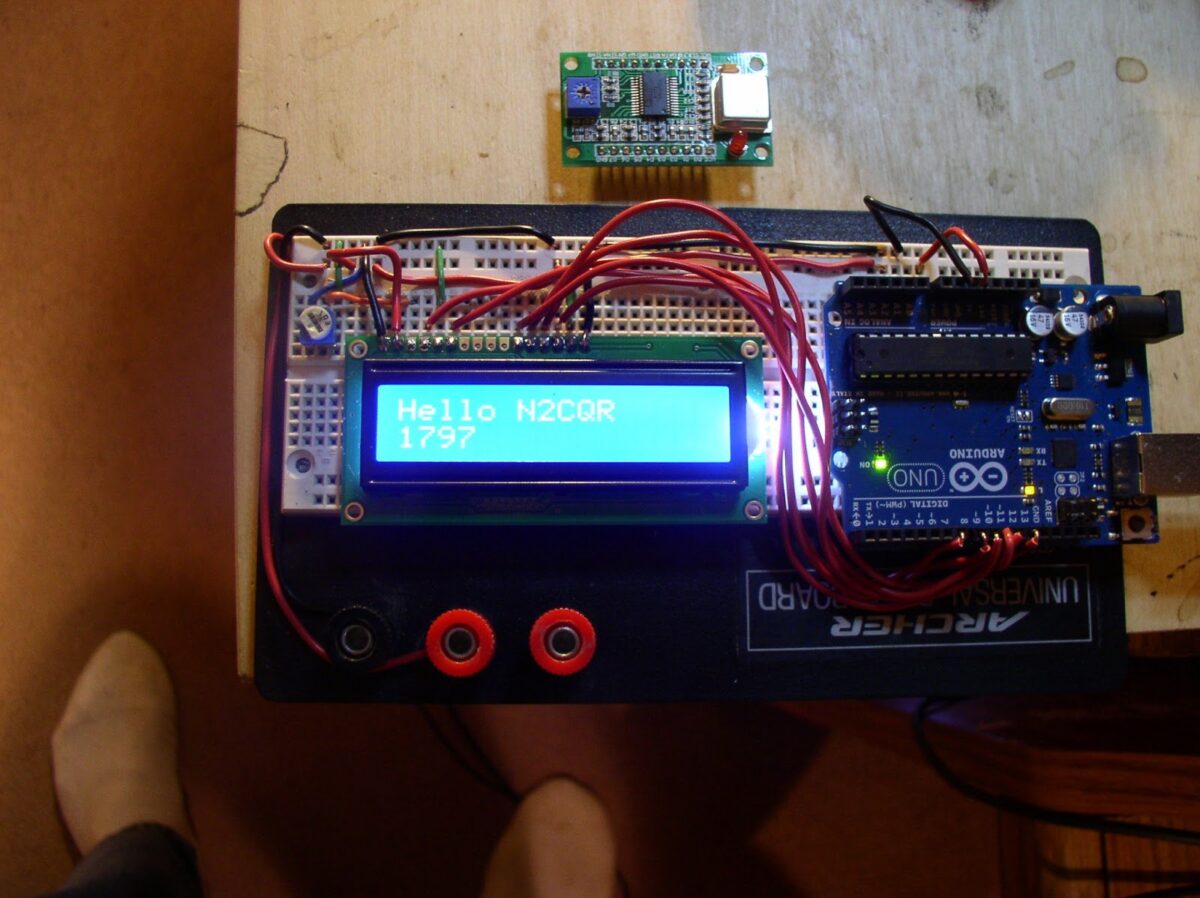
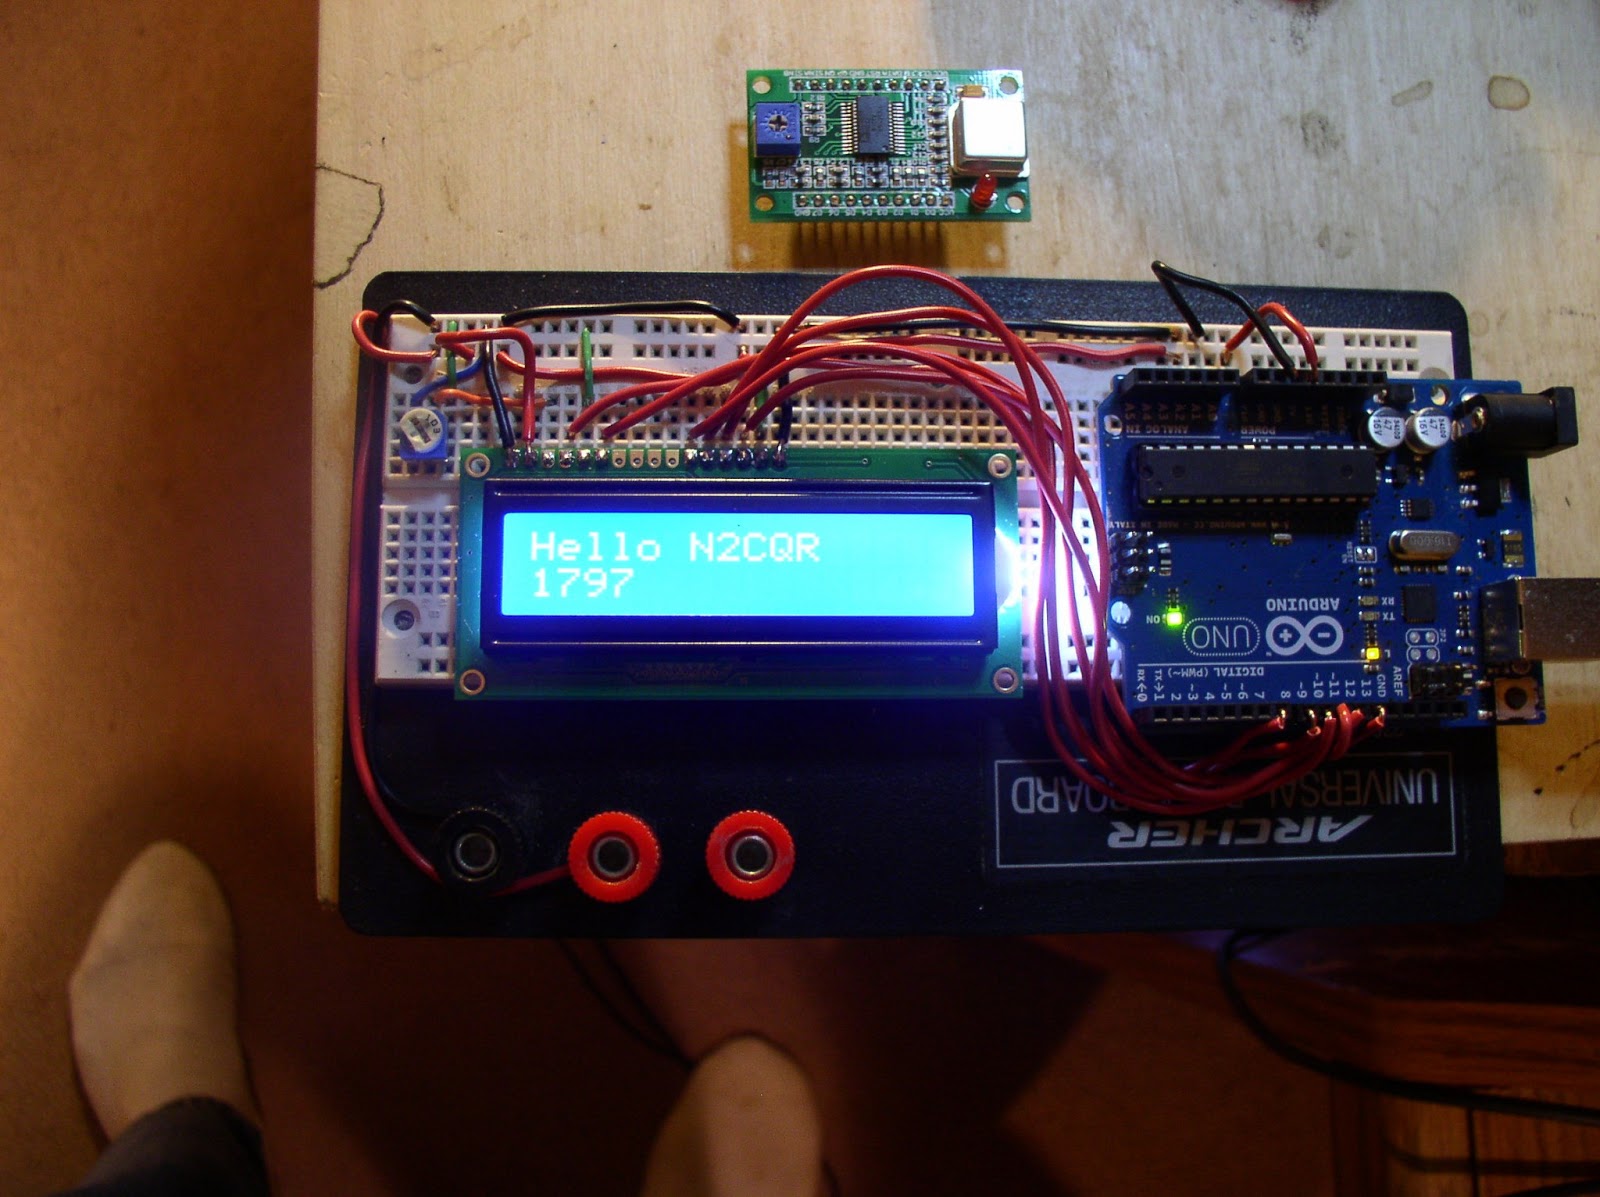
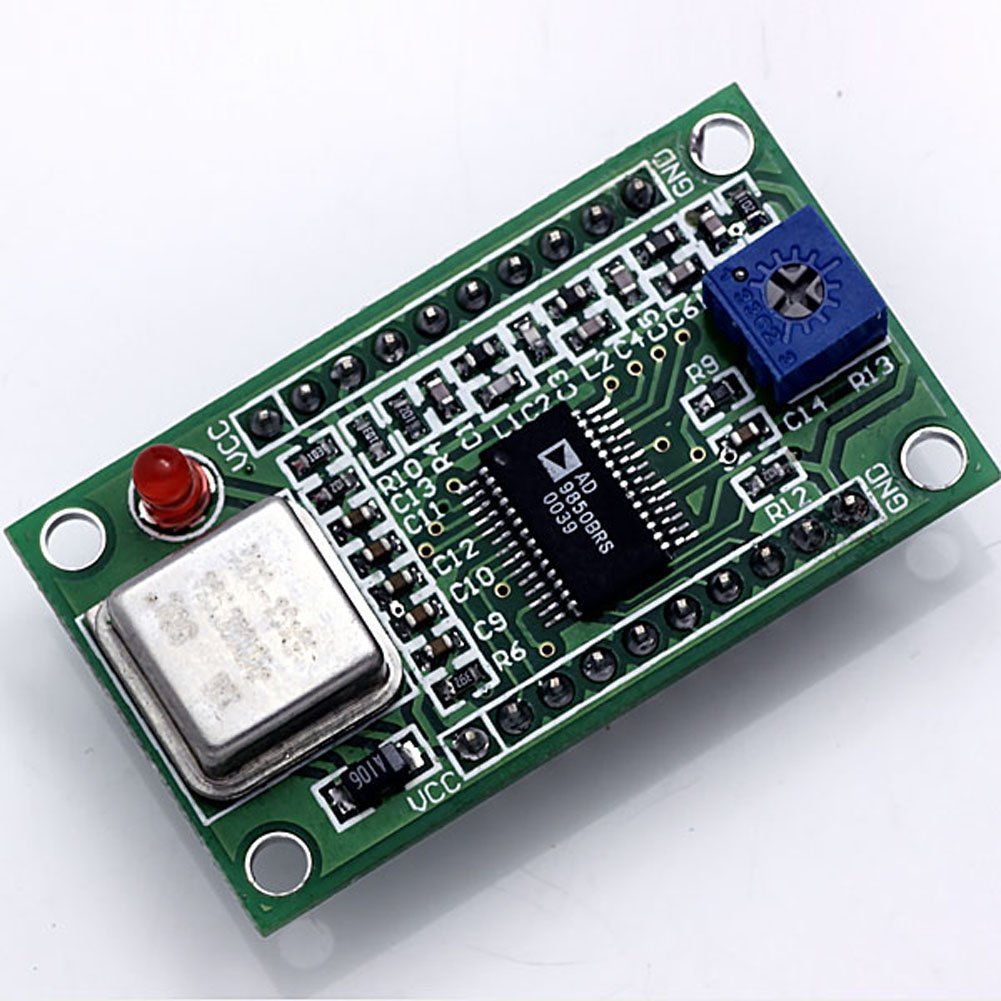
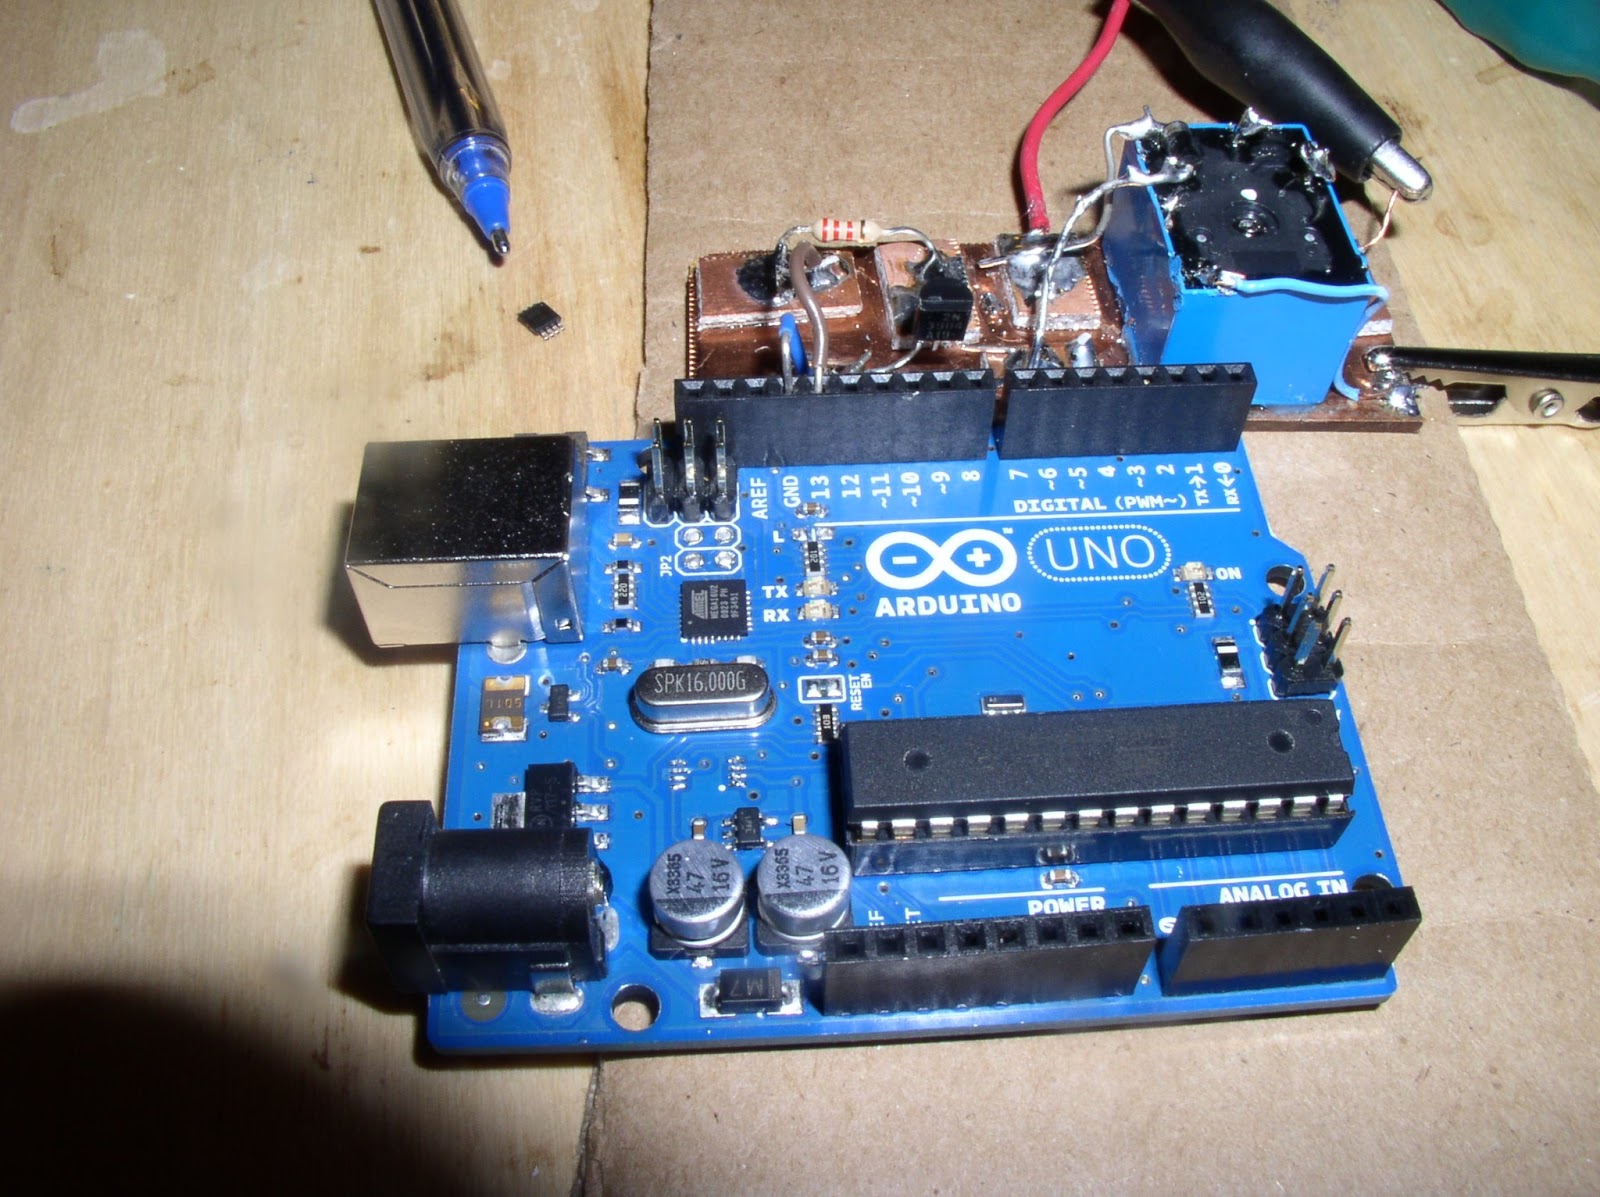
I followed Farhan’s advice and characterized the 11 MHz crystals in the filter. Then I used the AADE filter design software to build a 3 KHz filter. Using my Arduino DDS signal generator and the new Rigol ‘scope, I was able to do a manual sweep across the passband — it looked very close to what was predicted by the software.

This morning I built the bandpass filter for 20. As soon as that was done, I fired up the receiver. This was an amazing experience for me: a homebrew receiver that worked right away! That never happened before. I’m listening to 20 meters now. It sounds great. I even managed to demodulate and display some SSTV. The VFO seems very stable.

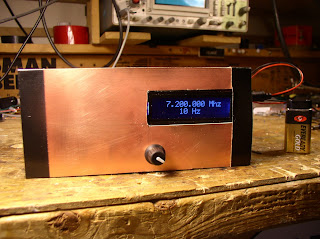
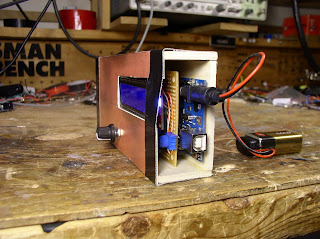
I still have to build the RF amplifier stages, the bandpass filter for 40 and low pass filters for 20 and 40 (I know Steve Smith is watching!). Then it will be time for cabinetry. I guess I should put some paint or varnish on that walnut box. Any recommendations? I’ll line it (on the inside) with copper flashing material.

Our book: “SolderSmoke — Global Adventures in Wireless Electronics” http://soldersmoke.com/book.htm Our coffee mugs, T-Shirts, bumper stickers: http://www.cafepress.com/SolderSmoke Our Book Store: http://astore.amazon.com/contracross-20

A Visit to the Arduino Factory (video)

Named for an Italian bar, produced by cool people in Ivrea who wield soldering irons and wear T-shirts that say “Make it Simple.” You gotta love Arduino!

Today I will finish connecting my Arduino Uno to my Doug Demaw Lil’ Slugger 10 Beacon rig. Code (computer code!) by K6HX.

Our book: “SolderSmoke — Global Adventures in Wireless Electronics” http://soldersmoke.com/book.htm Our coffee mugs, T-Shirts, bumper stickers: http://www.cafepress.com/SolderSmoke Our Book Store: http://astore.amazon.com/contracross-20

Arduino Sidecar (instead of a Shield)

In my last post I described my Arduino Keyer Kludge. In that project I didn’t use the standard “shield” board that normally sits atop the Arduino board. I had used a shield in an earlier project and I didn’t really like it. I prefer to have all the electronics and connections on the top of the board — this makes for easier experimentation and modification.

Above you can see my “sidecar” technique. I build the circuit on a piece of copper clad board using isolation pads superglued to the copper (aka “Manhattan style”). For the Arduino board, I just superglue a piece of balsa wood to the copper clad board, and attach the Arduino board to the balsa with small wood screws. Electrical connections from the Arduino to the sidecar just go from the Arduino pins to the appropriate points in the sidecar circuit via small-gauge wire.

Our book: “SolderSmoke — Global Adventures in Wireless Electronics” http://soldersmoke.com/book.htm Our coffee mugs, T-Shirts, bumper stickers: http://www.cafepress.com/SolderSmoke Our Book Store: http://astore.amazon.com/contracross-20

Paddle Output Arduino Keyer Kludge (video)

Ooops — I got my keyer terminology wrong in this video. The K1EL keyer just needs a “paddle keyer” input, not an iambic keyer. One line is brought to ground for dots, another for dashes. (With an iambic keyer, if you make both contacts at the same time you get a string of alternating dots and dashes.) My homebrew cootie keyer did the job, but I wasn’t very proficient, hence the need for this digital kludge. I also got the name of the Arduino guru wrong: he is Massimo Banzi. Mi dispiace Massimo.

Our book: “SolderSmoke — Global Adventures in Wireless Electronics” http://soldersmoke.com/book.htm Our coffee mugs, T-Shirts, bumper stickers: http://www.cafepress.com/SolderSmoke Our Book Store: http://astore.amazon.com/contracross-20

The Manassas Hamfest

Elisa heroically accompanied me to the Manassas Hamfest on Sunday. We had fun. I thought they had a good turnout of vendors and tailgaters, and it seemed like the sellers of real ham stuff were winning the battle against the encroaching computer people. I saw many interesting old boatanchor radios, including two R-390A receivers, one HT-37, an HW-101 and several other Heathkits.

As for NEW technology, the fellows from the NOVA LABS maker space had a very interesting table, and their web site has a very kind acknowledgement that hams were “the original hackers, who organized build groups and hack labs similar to modern day makerspaces—back before people called themselves “Makers” and long before it was “cool.” They had a 3-D printer that was doing its thing in a very impressive manner. They also had some quadro- and octo-copters built by a group called DC Area Drone User Group. Very cool. Want one.

Inspired by Nick Kennedy, I have included in this post a picture of my purchases from the hamfest. As you can see, I controlled myself. But I couldn’t resist the humungous flashlight! I got a bunch of .1 caps (should have bought more!). Got a Bud-box (maybe for an Arduino DDS project?) The little circuit board with the IF cans is interesting. I bought it (1 dollar!) for the 365 pf variable cap, but I later realized that it is probably a complete All-American Five receiver on a single board. I’m not crazy about tubes on PC boards, but this one may have some possibilities. The roll of tape is supposedly coax sealer. I also got a little 35 mm slide viewer, and a 12 volt wall wart.

I wore the “Real Radios Glow in the Dark” T-shirt that Elisa got me (on the recommendation of Rogier). I got more positive comments on that shirt than on any other piece of clothing I’ve ever owned!

And we saw our first Cicadas of this 17 year cycle.

Our book: “SolderSmoke — Global Adventures in Wireless Electronics” http://soldersmoke.com/book.htm Our coffee mugs, T-Shirts, bumper stickers: http://www.cafepress.com/SolderSmoke Our Book Store: http://astore.amazon.com/contracross-20

R-390A and Homebrew TX put in Transceive Mode (VIDEO)

N8ZRY has a very nice video on his recent adventures with the legendary R-390A receiver (want one!) and his homebrew 20 meter SSB transmitter. He manages to essentially put the receiver and transmitter into “transceiver” mode. Very nice. I wonder if he had previously used the old standard “spot” or “net” “zero beat by ear” method? This video has me thinking about ways to bring my many separate receivers and transmitters closer together. The problem is that they all use different IF frequencies (the crystal filters are at different frequencies). But using my Arduino-based DDS VFO, I guess it wouldn’t be too difficult to program the thing to generate one VFO freq for transmit, and a different VFO freq on receive, in effect putting the transmitter and receiver on the same frequency.

Both the R-390A and the homebrew transmitter look great. Thanks Greg!

Our book: “SolderSmoke — Global Adventures in Wireless Electronics” http://soldersmoke.com/book.htm Our coffee mugs, T-Shirts, bumper stickers: http://www.cafepress.com/SolderSmoke Our Book Store: http://astore.amazon.com/contracross-20

Quote of the Day: On Tinkering

Finally, some justification for my “build first, design later” method:

“Contraptions, machines, wildly mismatched objects working in harmony — this is the stuff of tinkering. Tinkering is, at its most basic, a process that marries play and inquiry.”

from www.exploratorium.edu/tinkering Quoted in Massimo Banzi’s book “Getting Started with Arduino.”

Our book: “SolderSmoke — Global Adventures in Wireless Electronics” http://soldersmoke.com/book.htm Our coffee mugs, T-Shirts, bumper stickers: http://www.cafepress.com/SolderSmoke Our Book Store: http://astore.amazon.com/contracross-20

1-29 MHz In One Small Box

This weekend I put the Arduino/AD9850 Direct Digital Synthesis device into a box this weekend. It is sort of evolving into a general purpose HF signal generator and/or VFO. It is really kind of neat that this little collection of boards can generate RF across that range, with accurate digital readout. Thanks again to Richard Visokey, AD7C, for the circuit and the code. As you can see, my cabinet making skills will never land me a job on the Discovery Channel, but I’m kind of pleased with the box. I picked up the wood panels from a hobby/craft shop.

I left a lot of space in the box. I envision an amplifier taking the output from its current .4 milliwatts up to around 10 milliwatts, followed by step attenuators (pads).

Here is the other end. Of course, I could have just taken the ATMega chip out and avoided putting the whole Arduino board inside the box, but I’ll leave that exciting digital adventure for a future project.

Our book: “SolderSmoke — Global Adventures in Wireless Electronics” http://soldersmoke.com/book.htm Our coffee mugs, T-Shirts, bumper stickers: http://www.cafepress.com/SolderSmoke Our Book Store: http://astore.amazon.com/contracross-20

Stacked Shields — My Arduino DDS LCD Sandwich

You can barely see the Arduino board down at the bottom. Above it is a homebrew shield that has the DDS board. On that shield I also put a female header for a small 16X2 LCD board. This arrangement avoids the rats nest of wire that often accompanies these digi projects. This thing had me pulling my hair out yesterday. I couldn’t get the display to work. After a lot of checking and re-soldering and testing, I concluded the LCD board was bad. Good thing there is a Microcenter right down the road. I got a new display and my composure returned.

Mark, K6HX, over at Brainwagon has been encouraging me to continue down the digital path. Other SolderSmoke friends are wary of this digitization — one wrote asking “Where is the real Bill Meara and what have you done with him?”

I like the Arduino projects. This little device certainly demonstrates how you can do things with the digi stuff that would be extremely difficult to do with our beloved analog, discrete component circuitry. On the other hand, as I was pulling my hair out trying to figure out WHY the display wouldn’t display, I came across an e-mail describing Peter Parker’s latest minimalist discrete component rig. Why, I asked myself, had I left the happy land of understandable circuits? Why had I allowed myself to be sucked in by the siren song of Arduino?

I guess it is good to try something new, to learn something, to get out of your comfort zone. But excuse me now — I’m going to fire up my 17 meter analog discrete component rig. The one with VXOs in both the receiver and the transmitter. But I’m going to leave the Arduino DDS on — I like looking at the display.

Our book: “SolderSmoke — Global Adventures in Wireless Electronics” http://soldersmoke.com/book.htm Our coffee mugs, T-Shirts, bumper stickers: http://www.cafepress.com/SolderSmoke Our Book Store: http://astore.amazon.com/contracross-20

Building an Arduino Shield

No, an Arduino shield is not something that will protect you from Arduinos. Resistance IS futile! In the world of microcontrollers, “shields” are, in essence, PC boards with headers that allow you to stack them atop the main microcontroller board. So instead of the digital rat’s nest of wires that you see in my proto-board version of the DDS signal generator, we’ll have the AD9850 board mounted above the Arduino on its shield. But take heart, my fellow luddites: I have left a lot of space on the board for the construction of a DISCRETE COMPONENT, ANALOG, NON-DIGITAL amplifier. I’d like to get the output from the 9850 up to around 7 dbm.

Our book: “SolderSmoke — Global Adventures in Wireless Electronics” http://soldersmoke.com/book.htm Our coffee mugs, T-Shirts, bumper stickers: http://www.cafepress.com/SolderSmoke Our Book Store: http://astore.amazon.com/contracross-20

Arduino Adventures: LCD screen added

Pretty impressive for a guy whose previous project was a crystal controlled DSB transceiver, don’t you think? They say that variety is the spice of life, and the Arduino board has been adding quite a bit of spice to my tech life lately. That tiny board up above the proto board is the six dollar DDS-9850 board — it arrived in an envelope from Shenzhen, China last week. I hope to connect it to the Arduino and the LCD to make a sig generator or VFO.

Our book: “SolderSmoke — Global Adventures in Wireless Electronics” http://soldersmoke.com/book.htm Our coffee mugs, T-Shirts, bumper stickers: http://www.cafepress.com/SolderSmoke Our Book Store: http://astore.amazon.com/contracross-20

Direct Digital Synthesis

I just bought one of these. I hope to hook it up to an Arduino and turn it into a VFO. Or a signal generator. Six bucks!

http://www.amazon.com/dp/B009I7DR7E/ref=pe_175190_21431760_3p_M3T1_ST1_dp_1

Our book: “SolderSmoke — Global Adventures in Wireless Electronics” http://soldersmoke.com/book.htm Our coffee mugs, T-Shirts, bumper stickers: http://www.cafepress.com/SolderSmoke Our Book Store: http://astore.amazon.com/contracross-20

King of the Nerds

Are you a super fan of STAR WARS, STAR TREK, GAME OF THRONES, LORD OF THE RINGS, or BATTLESTAR GALACTICA? Are you a GAMER who owns every console and maxes out trophies and achievements? Do you have an outrageous collection of TOYS and/or COMIC BOOKS? Are you passionate about MATHEMATICS, PHYSICS, or BIOLOGY? Do you build ROBOTS or PROGRAMS for fun? Are you obsessed with SUPER HEROES? Are you a D&D or WoW fanatic? Do you love everything SCI-FI? Are you ARDUINO proficient? Do you know at least 100 digits of Pi?Is your IQ at least two standard deviation above the mean? Do you consider yourself a GEEK or a NERD?

Submit a tape and possibly win 100K.

http://nerdking.net/

Our book: “SolderSmoke — Global Adventures in Wireless Electronics” http://soldersmoke.com/book.htm Our coffee mugs, T-Shirts, bumper stickers: http://www.cafepress.com/SolderSmoke Our Book Store: http://astore.amazon.com/contracross-20

Arduino, K6HX’s code, and an RBN (minimum) speed limit?

Hello Mark: I’ve been using your code. Very nice. Easy to use and modify, even for a digital dunce like me.
I’ve been using an Arduino and your code to key my 20 meter QRP transmitter. I watch the Reverse Beacon Network to see how I’m getting out. I think your code let me discover something about RBN: there may be a lower “speed limit” on the skimmers. I noticed that when I left your code at the default 12 wpm, I was not picked up by the skimmers. When I called CQ the old fashioned way (with my hand!) at 15 wpm I got plenty of spots. This morning I changed the speed setting on your code to 15 wpm and — sure enough — immediately got picked up by an RBN station.
Anyway, thanks for the code and for your Brainwagon blog.
73 Bill

Our book: “SolderSmoke — Global Adventures in Wireless Electronics” http://soldersmoke.com/book.htm Our coffee mugs, T-Shirts, bumper stickers: http://www.cafepress.com/SolderSmoke Our Book Store: http://astore.amazon.com/contracross-20

Arduino Repaired (well, sort of)

Thanks to info from Leif, KC8RWR, about the purpose of the chip that was heating up on my Arduino board (an LM386 used to determine which socket was supplying voltage for the board) I decided to try just taking the hot chip off the board. This afternoon I fired up my reflow station and blew some 466 degree F air on that chip. It came right off and the Arduino appears to work just fine without it.

This was only a semi-satisfying repair. It would have been much better if I’d really known what I was doing, and if I’d really known what was going on with that chip.

The removed chip is up by the tip of the pen (TOO SMALL!). The transistor and the relay that keys the transmitter are on a piece of PC board above the Arduino.

That Arduino called CQ for me on 20 meters tonight — Mel, K4JFF, in Georgia responded. Thanks Leif! And thanks again to Mark, K6HX, for the code.

Our book: “SolderSmoke — Global Adventures in Wireless Electronics” http://soldersmoke.com/book.htm Our coffee mugs, T-Shirts, bumper stickers: http://www.cafepress.com/SolderSmoke Our Book Store: http://astore.amazon.com/contracross-20

Adventures with Small Computers


I’ve succumbed to the lure of the tiny computers and microprocessors. This weekend I was playing with the Arduino that I bought (supposedly) for Billy. You see, I have a little microprocessor-based keyer in my ten meter beacon rig (Demaw’s “Lil’Slugger”) . It works fine once you get the desired Morse sequence into it, but getting that done is difficult and frustrating for someone (like me) unaccustomed to an iambic keyer. So I was thinking that this would be easier just to replace the keyer with an Arduino. I was right. With some help and advice from Billy, I got the Arduino going, and got the little LED blinking. Then I took some code from Mark K6HX, modified it for my call-sign, and loaded it into the Arduino. No problem at all. Kind of fun. And it opens your eyes to all the possible applications of this little board.

Unfortunately, in the course of fooling around with the interface between the board and my rig I think I did damage to my Arduino. I managed to blow out the blinking (pin 13) LED on the board. I could live without that, but now the ICs get very hot (especially the little surface mount chip just below the 16 MHz crystal). Anyone hope of fixing this? (I’ve already ordered a replacement board, but I feel guilty about this.)

Here’s a good article describing the pros and cons of Arduino, Raspberry Pi and Beagle Bone:

http://blog.makezine.com/2013/04/15/arduino-uno-vs-beaglebone-vs-raspberry-pi/

Our book: “SolderSmoke — Global Adventures in Wireless Electronics” http://soldersmoke.com/book.htm Our coffee mugs, T-Shirts, bumper stickers: http://www.cafepress.com/SolderSmoke Our Book Store: http://astore.amazon.com/contracross-20

Arduino and Bugs (real bugs! billions of them!)

http://blog.makezine.com/2013/04/10/swarmageddon-cicadas-helping-crowdsource-citizen-science/

Our book: “SolderSmoke — Global Adventures in Wireless Electronics” http://soldersmoke.com/book.htm Our coffee mugs, T-Shirts, bumper stickers: http://www.cafepress.com/SolderSmoke Our Book Store: http://astore.amazon.com/contracross-20

SolderSmoke Podcast #145

SolderSmoke Podcast #145 (July 29, 2012) is available


http://soldersmoke.com/soldersmoke145.mp3

— Derecho Storm hits Northern Virginia

— Cappuccio impersonates a Pitt Bull
— July 4 Fireworks
— A 17 Meter QSO with W5JAY (QRP Hall of Famer)
— Rules of Thumb for Decoupling Caps (.1 uF now suspect)
— Heathkit: Mic jack? Or Mike jack? (Who is this Mike guy?)
— On the air with the K2ZA DX-100
— Saturnian Sidewalk Astronomy
— NJQRP “Chat With The Designers” — Mandatory Listening!
— Back with the ARRL: Goodwill Transmitters and Herring Aid Receivers
— Billy’s computer build and Arduino adventures
— Fixing up NE602 20 meter DC rig
— Join G-QRP! Support our SPRAT!
— MAILBAG

Our book: “SolderSmoke — Global Adventures in Wireless Electronics”http://soldersmoke.com/book.htmOur coffee mugs, T-Shirts, bumper stickers: http://www.cafepress.com/SolderSmokeOur Book Store: http://astore.amazon.com/contracross-20

KJ6VU Talks about Microcontrollers at Dayton

Podcast listeners will recall that George, KJ6VU, of Sierra Radio Systems, was a sponsor of SolderSmoke. When I was running George’s announcements, I felt kind of bad about the fact that I really didn’t have a good feel for the product, or how I might use it. I’ve also felt guilty about the fact that I haven’t yet put to use the HamStack starter kit that George sent me.


I feel that the time is coming for me to redeem myself. The radio gods are pushing me in the direction of microcontrollers:
1) Billy is getting into them.
2) This weekend, for no apparent reason, I started working on my old N3ZI Digital Dial (a gift from Jerry, NR5A). It is built around a microprocessor.
3) I need a new frequency generator.
4) I came across George’s video (above)

In the video, George does a great job of explaining how microcontrollers can be used in ham radio. In answering the last question from the audience, he explains the differences between microcontrollers and the new Raspberry Pi boards.

Great stuff! Thanks George!

Our book: “SolderSmoke — Global Adventures in Wireless Electronics”http://soldersmoke.com/book.htmOur coffee mugs, T-Shirts, bumper stickers: http://www.cafepress.com/SolderSmokeOur Book Store: http://astore.amazon.com/contracross-20